How to play video with STM32
This guide provides a professional workflow for preparing video and audio assets specifically for the STM32N6 and other high-performance microcontrollers (MCUs).
Abstract
Embedded systems often lack the hardware decoders required for modern, high-compression formats like H.264 or, even when they do, the ecosystem tools to use it in the MCU might be lacking or you simply don’t have enough memory to store the content. To achieve smooth 60 FPS video and synchronized audio on MCUs in general, while storing these contents in the available memory, developers usually have to “downgrade” media into raw or semi-raw formats. This article details using FFmpeg to create MJPEG-encoded AVI files and 16-bit PCM WAV files, ensuring the MCU can stream data directly to the display and external audio codec with minimal CPU overhead.
1. Introduction
The STM32N6 series is a powerhouse, but decoding video still requires a strategic approach. While an MP4 file is great for the web, it is computationally expensive. By converting video to Motion JPEG (MJPEG), each frame becomes an independent JPEG image that the STM32 can decode using its hardware JPEG accelerator. Similarly, converting audio to uncompressed PCM allows the DMA (Direct Memory Access) to feed the SAI peripheral without needing a software-based MP3 or AAC decoder.
This part 1 will cover only the video, part 2 will cover only the audio and part 3 will cover the synchronization of the two.
2. Prerequisites
To follow this tutorial, you will need:
- FFmpeg installed> FFmpeg. Optionally, have the FFmpeg added to your system’s PATH. This facilitates the usage, but its not mandatory
- Source Material: Video material in MP4 files (1080p or 720p). We collected the video from Google’s Gemini Veo 3.1
- Evaluation Board: STM32N6570-DK | Product – STMicroelectronics
- Storage: On board NOR FLASH memory controlled via HSPI interface connected to your STM32 to handle the increased file sizes of MJPEG and WAV.
- ST software: STM32CubeMX, STM32CubeIDE, STM32CubeProg and TouchGFX
3. Base Implementation to play video STM32
To prepare your files, we split the process into two distinct streams: a video-only AVI and a mono-audio WAV.
Just as a minor guidance, the board select has a large display, considering MCUs standards:
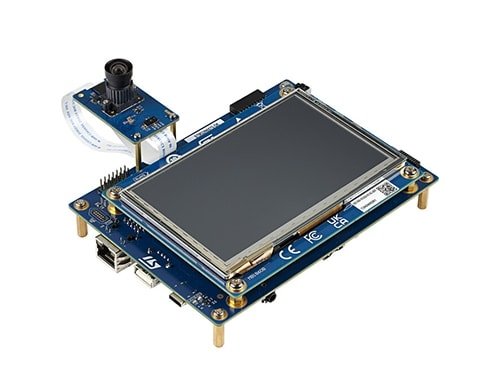
The display resolution is 800×480 and we’ll take into account for the video compression and conversion.
3.1 Video Conversion (MP4 to AVI)
Open the ffmpeg via cmd, power shell or similar and issue the command below:
ffmpeg -i "input.mp4" -s 800x480 -vcodec mjpeg -q:v 1 -pix_fmt yuv420p -color_range 1 -strict -1 -an "output.avi"
- -s 800×480: Matches the native LCD resolution. This prevents the MCU from having to perform costly software scaling.
- -vcodec mjpeg: Uses the Motion JPEG codec. Each frame is a discrete JPEG, allowing for “Instant-On” playback and easy seeking.
- -q:v 1: Sets the highest quality (lowest compression). In embedded systems, higher quality often means “simpler” data patterns for the decoder.
- -pix_fmt yuv420p: A standard color space compatible with most hardware JPEG decoders found in STM32 chips.
- -an: Removes audio. Keeping video and audio in separate files is often preferred in embedded C to simplify file pointer management during the main loop.
3.2 Audio Conversion (MP4 to WAV)
While the available codec on the board allows stereo audio> WM8904 | Cirrus Logic, the code example will focus on mono, just to facilitate the usage with SAI as well as total size. Open the ffmpeg via cmd, power shell or similar and issue the command below:
ffmpeg -i "input.mp4" -vn -ar 16000 -ac 1 -c:a pcm_s16le "output_mono.wav"
- -vn: Discards video data.
- -ar 16000: Sets a 16KHz sample rate. This is one of the standard for audio, if high-fidelity is desired, increase it to 44.1KHz. Both frequencies are easily generated by the STM32’s PLL clocks and SAI peripheral.
- -ac 1: Converts to Mono. This halves the data the MCU must move via DMA and reduces RAM buffer requirements.
- -c:a pcm_s16le: Crucial. This outputs “Signed 16-bit Little Endian” samples. Since ARM Cortex-M cores are Little Endian, the MCU can read these values directly into its registers without any byte-swapping logic.
3.3 Optional - Automation: Python Batch Processing Script
If you have a library of videos for a UI/UX project, manual conversion is inefficient. The following script automates the extraction and optimization of both files.
Python
					import subprocess
import os

# Configuration
INPUT_DIR = r"C:\ffmpeg\videos"
OUTPUT_DIR = r"C:\ffmpeg\output"
FFMPEG_PATH = "ffmpeg" # Assumes ffmpeg is in PATH

def convert_for_stm32(filename):
    input_path = os.path.join(INPUT_DIR, filename)
    base_name = os.path.splitext(filename)[0]

    video_out = os.path.join(OUTPUT_DIR, f"{base_name}_video.avi")
    audio_out = os.path.join(OUTPUT_DIR, f"{base_name}_audio.wav")

    # 1. Convert Video to MJPEG AVI
    video_cmd = [
        FFMPEG_PATH, "-i", input_path,
        "-s", "800x480", "-vcodec", "mjpeg", "-q:v", "1",
        "-pix_fmt", "yuv420p", "-color_range", "1", "-an", "-y", video_out
    ]

    # 2. Convert Audio to PCM 16-bit Mono WAV
    audio_cmd = [
        FFMPEG_PATH, "-i", input_path,
        "-vn", "-ar", "44100", "-ac", "1", "-c:a", "pcm_s16le", "-y", audio_out
    ]

    print(f"Processing: {filename}...")
    subprocess.run(video_cmd, check=True)
    subprocess.run(audio_cmd, check=True)

if __name__ == "__main__":
    if not os.path.exists(OUTPUT_DIR):
        os.makedirs(OUTPUT_DIR)

    for file in os.listdir(INPUT_DIR):
        if file.endswith(".mp4"):
            convert_for_stm32(file)
    print("Conversion Complete!")
For embedded systems like the STM32N6, converting a WAV file into a C array allows you to store audio directly in the internal Flash memory. This is ideal for short UI sounds, alerts, or startup melodies where you don’t want the overhead of a file system (FatFs). Part 2 will use a short audio file stored in the internal memory.
Since you already have the processed WAV, here are the two most common ways to convert it into a C-compatible format.
Method 1: Using the xxd Utility (Quickest)
If you are on Linux, macOS, or using Git Bash on Windows, xxd is the industry standard for “hex dumping” a binary into a C include file.
Bash Command:
xxd -i output_mono.wav > audio_data.h
What this generates: It creates a file containing a unsigned char array and a length variable:
					unsigned char output_mono_wav[] = {

  0x52, 0x49, 0x46, 0x46, 0x64, 0x1f, 0x00, 0x00, ...

};

unsigned int output_mono_wav_len = 8036;
Method 2: Python Script (Best for STM32 Optimization and the one used)
The xxd method includes the 44-byte WAV header and uses unsigned char (8-bit). For an STM32, it is much more efficient to store the data as a uint16_t array (16-bit) and strip the header to save Flash space. Also, the SAI peripheral allows the 16bit content, making it a straightforward DMA use case.
Use this script to create a “clean” C file with only the raw PCM samples:
import struct
input_wav = "output_mono.wav"
output_c = "audio_data.c"
def wav_to_c_array(infile, outfile):
with open(infile, "rb") as f:
# Skip the 44-byte WAV header to get raw PCM data
f.seek(44)
data = f.read()
# Convert binary bytes to 16-bit signed integers (Little Endian)
samples = struct.unpack(f'<{len(data)//2}h', data)
with open(outfile, "w") as f:
f.write('#include <stdint.h>\n\n')
# Use 'const' to ensure the data stays in Flash and doesn't consume RAM
f.write('const int16_t audio_samples_16k[] = {\n ')
for i, sample in enumerate(samples):
f.write(f"{sample}, ")
if (i + 1) % 12 == 0: # New line every 12 samples for readability
f.write("\n ")
f.write('\n};\n\n')
f.write(f'const uint32_t audio_samples_count = {len(samples)};\n')
wav_to_c_array(input_wav, output_c)
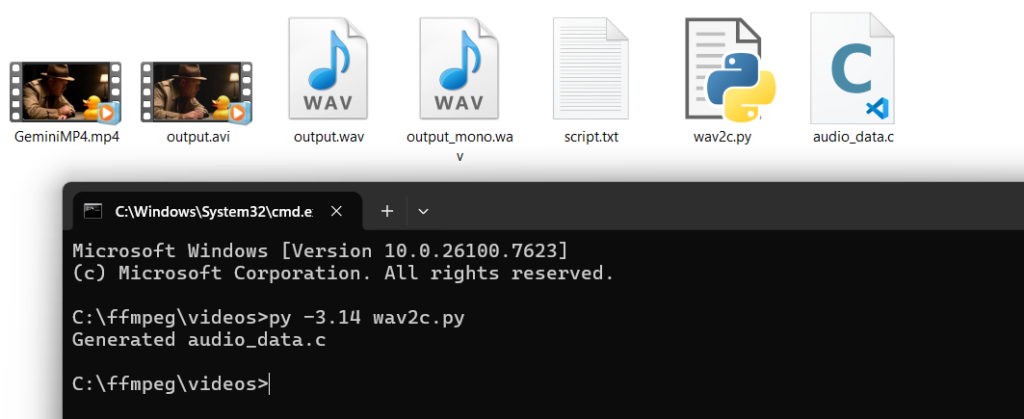
print(f"Generated {output_c}")
Part 2 Spoiler Alert! Implementation on STM32N6
Once you have your audio_data.c, you can play it back immediately without any header parsing logic.
- Placement in Memory
Because the STM32N6 has a complex memory map, you should use the const keyword to ensure the array is stored in “ROM”, if it had any. If the file is large, you might want to force it into a specific memory section (like external Octo-SPI Flash) using attributes:
const int16_t audio_samples_44k[] __attribute__((section(".extflash"))) = { ... };

Playback Code

Since the header is gone, your playback function becomes extremely simple:

extern const int16_t audio_samples_16k[];

extern const uint32_t audio_samples_count;

void PlayEmbeddedAudio(void) {

// We point directly to the array. No offset needed!

// We cast to uint16_t if the HAL expects unsigned data.

HAL_SAI_Transmit_DMA(&hi2s1, (uint16_t*)audio_samples_16k, audio_samples_count);

}
- Playback Code
Since the header is gone, your playback function becomes extremely simple:
					extern const int16_t audio_samples_16k[];

extern const uint32_t audio_samples_count;

void PlayEmbeddedAudio(void) {

// We point directly to the array. No offset needed!

// We cast to uint16_t if the HAL expects unsigned data.

HAL_SAI_Transmit_DMA(&hi2s1, (uint16_t*)audio_samples_16k, audio_samples_count);

}
There are some possible limitations, such as the transfer size, but that will be explained further in part 2.
Which method should you use?
- Use xxd if you want to keep the WAV header and use the ValidateWavHeader logic we wrote earlier.
- Use the Python Script if you want the smallest possible binary size and the fastest execution (direct 16-bit access).
Overall, using the ffmpeg and a simple python script, we can break down the simple initial mp4 video into the avi with no audio, the wav audio, wav audio converted into mono at a selected frequency and finally the audio_data.c for transfer.
4. Hands On - Play Video STM32
TouchGFX supports using MJPEG video starting from version 4.18. Video can be used to create more alive user interfaces or to show short instructions or user guides.
Video is included in the user interface through the Video Widget. This widget is available in TouchGFX Designer and can be added to the user interface as any other widget.
Note: Audio is not supported. It is therefore recommended to remove audio data from the video data, as we did before.
Alright, now lets start the application until we get the video widget and basic settings done:
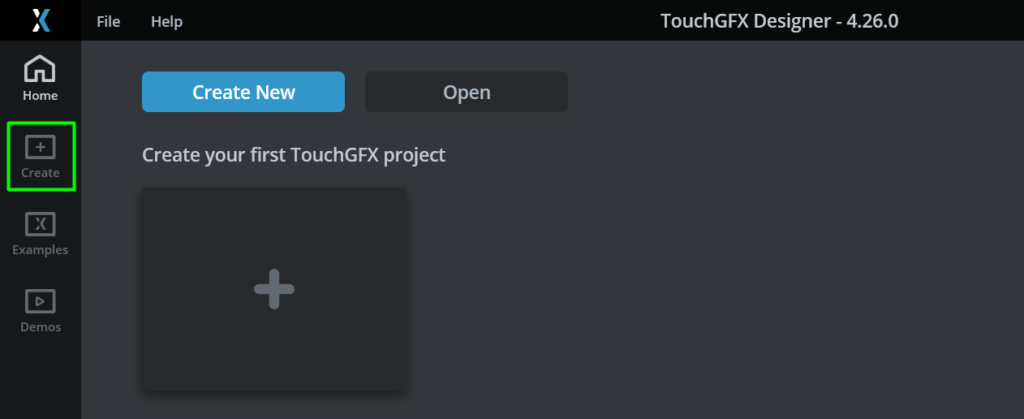
Step 1: Create your TouchGFX project
Open TouchGFX Designer and create the project:
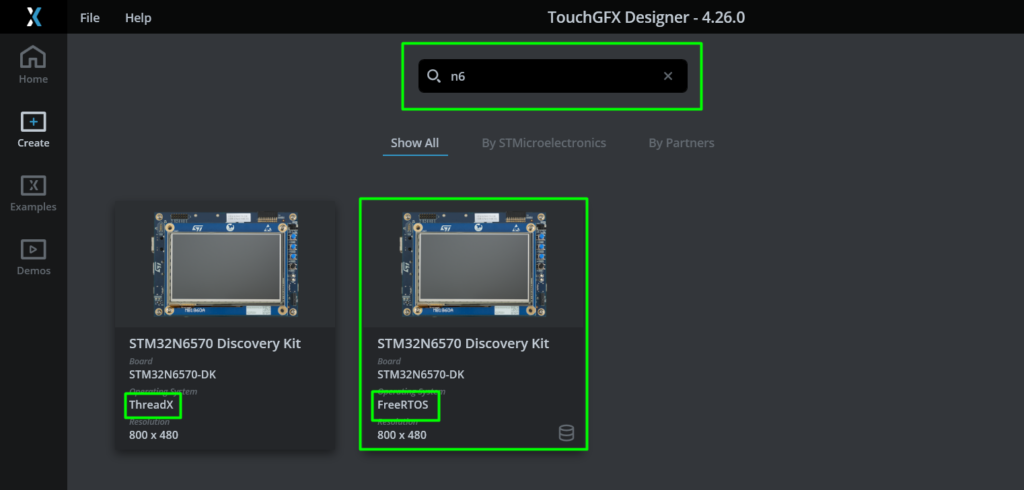
Filter by STM32N6 and select the preferred RTOS, both work just fine and in this case FreeRTOS will be the one used:
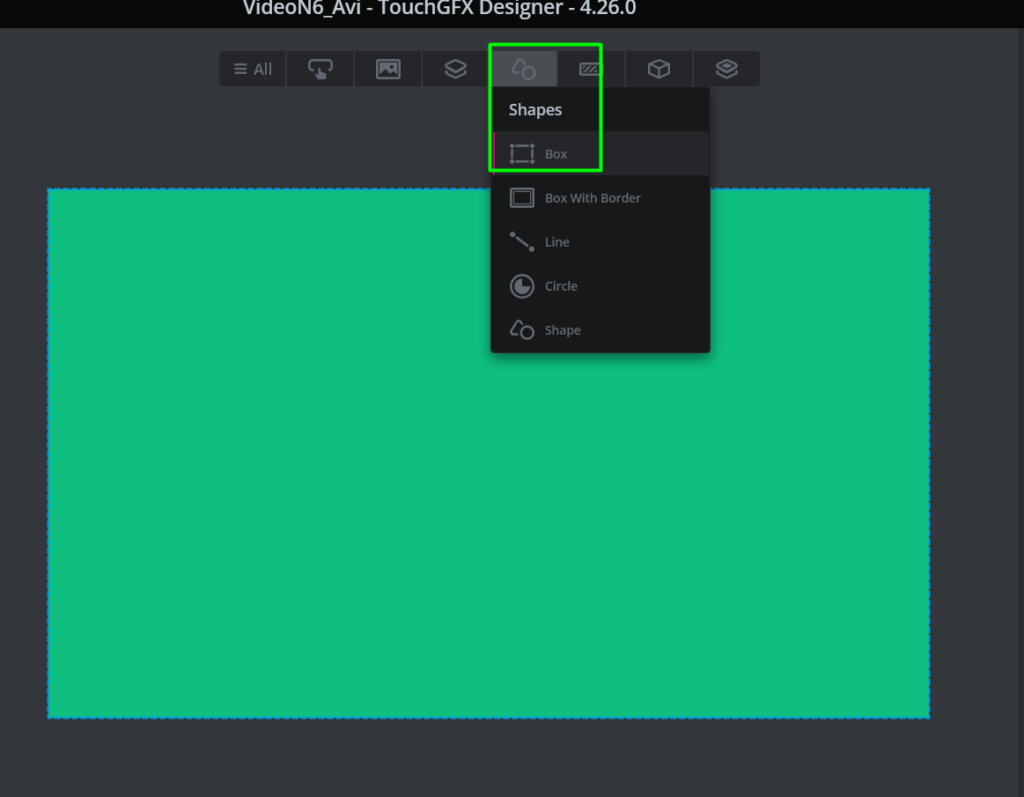
Once with the empty canvas, its possible to add a background color, in case your video is not full screen. This can be done via the BOX widget:
Using the Miscellaneous button, filter by video and add the video widget:
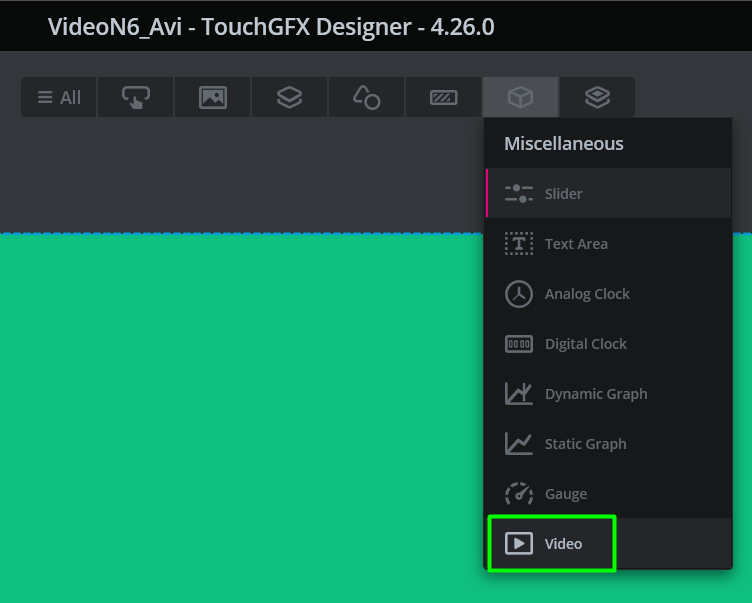
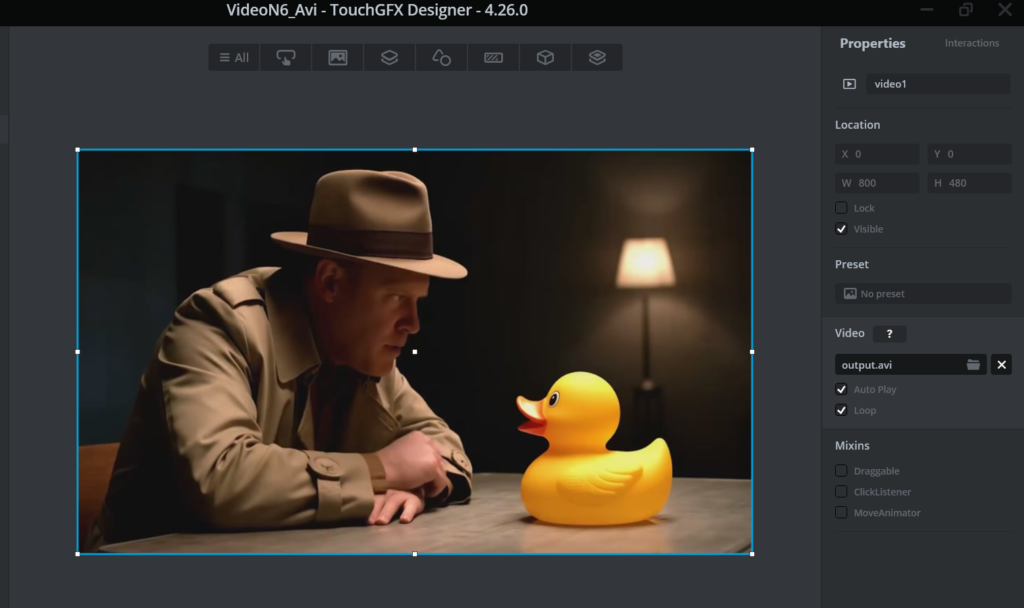
The default video will appear:

Use the video path to change from the default one to your converted video:
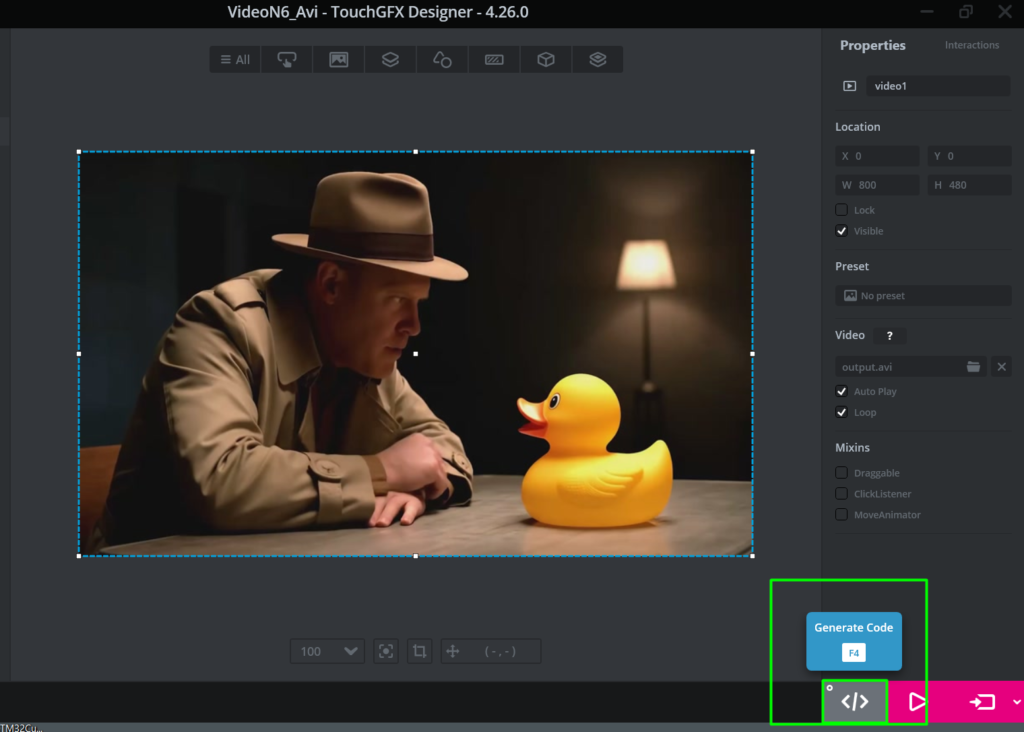
Believe it or not, that’s all it takes for the video to be part of your design. For now, we won’t add any buttons (PLAY, STOP, PAUSE).
Ok, now that we have the basics done, click on the Generate Project at the lower right corner:
Step 2: CubeIDE, Signature and Build
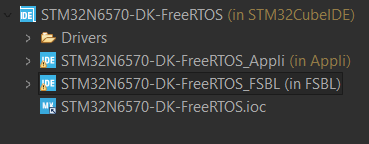
Within CubeIDE, click File->Open projects from File System and select the TouchGFX project. It is usually created at: C:\TouchGFXProjects\{Project Name}\STM32CubeIDE. As you’ll see, two projects will be added:
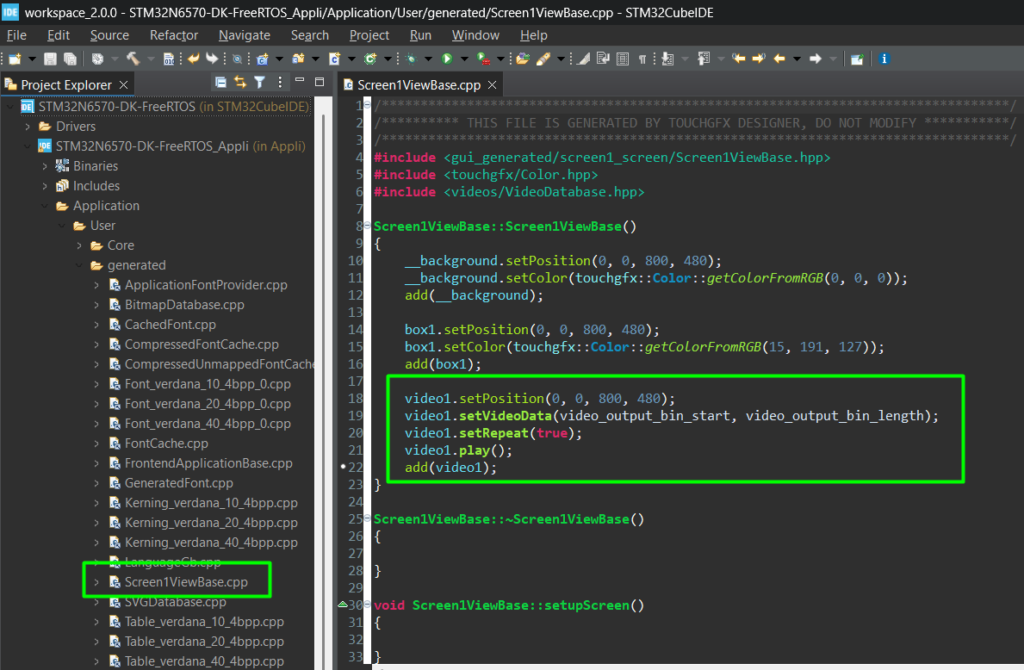
On the generated code, this is where the video is placed and the API is called to play it in loop/repeat:
The focus of this article is not to explain much about STM32N6, but the basics is that it has some unique behaviors when compared to any other STM32. First, it has no FLASH at all, which means that it relies on the system boot to identify something that is available on the external memory to them copy it into RAM. This code is called First Stage Boot Loader (FSBL) and it has a header that is read by this system boot. The role of the FSBL, in this application, is simply to configure the external memories, so our Appli can use it. The FSBL also requires a header.
OK, so these headers are added by invoking a signing tool, part of the STM32CubeProg, but don’t worry, with a simple post-build command, added for each project (FSBL and Appli) we can get it done. The Appli will also have a post-build command that places all assets (videos, images and other resources) into a given region of the external memory via a hex file. The signed binaries are in bin format.
Go to the Project Properties for both:
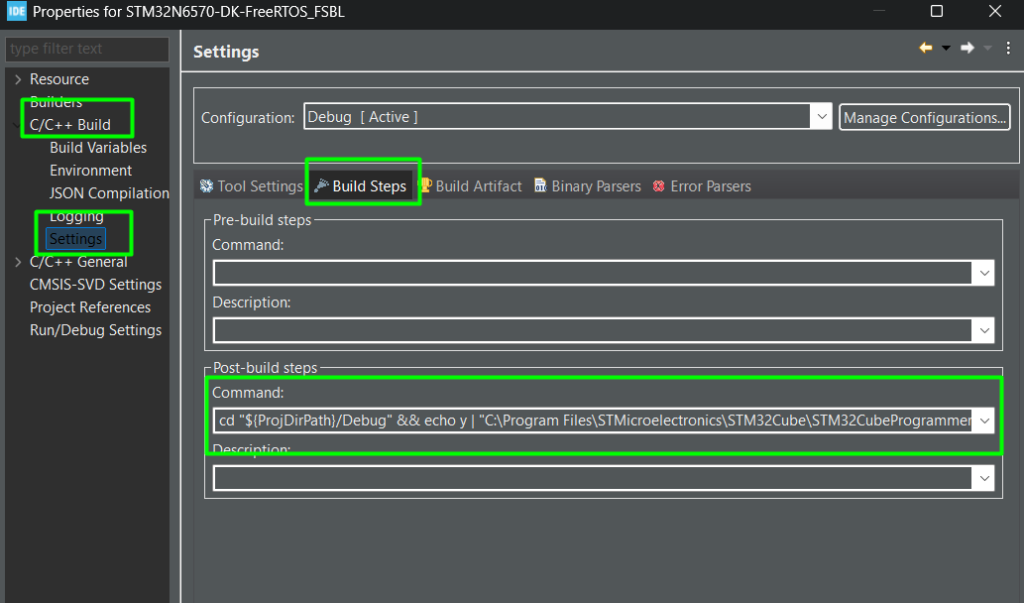
And copy/paste the following command:
- FSBL:
cd "${ProjDirPath}/Debug" && echo y | "C:\Program Files\STMicroelectronics\STM32Cube\STM32CubeProgrammer\bin\STM32_SigningTool_CLI.exe" -bin "${ProjName}.bin" -nk -of 0x80000000 -t fsbl -o "${ProjName}-Trusted.bin" -hv 2.3 -dump "${ProjName}-Trusted.bin" -align
- Appli:
arm-none-eabi-objcopy.exe -O binary --remove-section=ExtFlashSection --remove-section=FontFlashSection --remove-section=TextFlashSection ${ProjName}.elf ${ProjName}.bin&arm-none-eabi-objcopy.exe -O ihex --only-section=FontFlashSection --only-section=TextFlashSection --only-section=ExtFlashSection ${ProjName}.elf ${ProjName}_assets.hex && cd "${ProjDirPath}/Debug" && echo y | "C:\Program Files\STMicroelectronics\STM32Cube\STM32CubeProgrammer\bin\STM32_SigningTool_CLI.exe" -bin "${ProjName}.bin" -nk -of 0x80000000 -t fsbl -o "${ProjName}-Trusted.bin" -hv 2.3 -dump "${ProjName}-Trusted.bin" -align
Now, upon build, you’ll have the 3 binaries to program via CubeProg:
Under C:\TouchGFXProjects\{Projec Name}\STM32CubeIDE\FSBL\Debug the STM32N6570-DK-FreeRTOS_FSBL-Trusted.bin
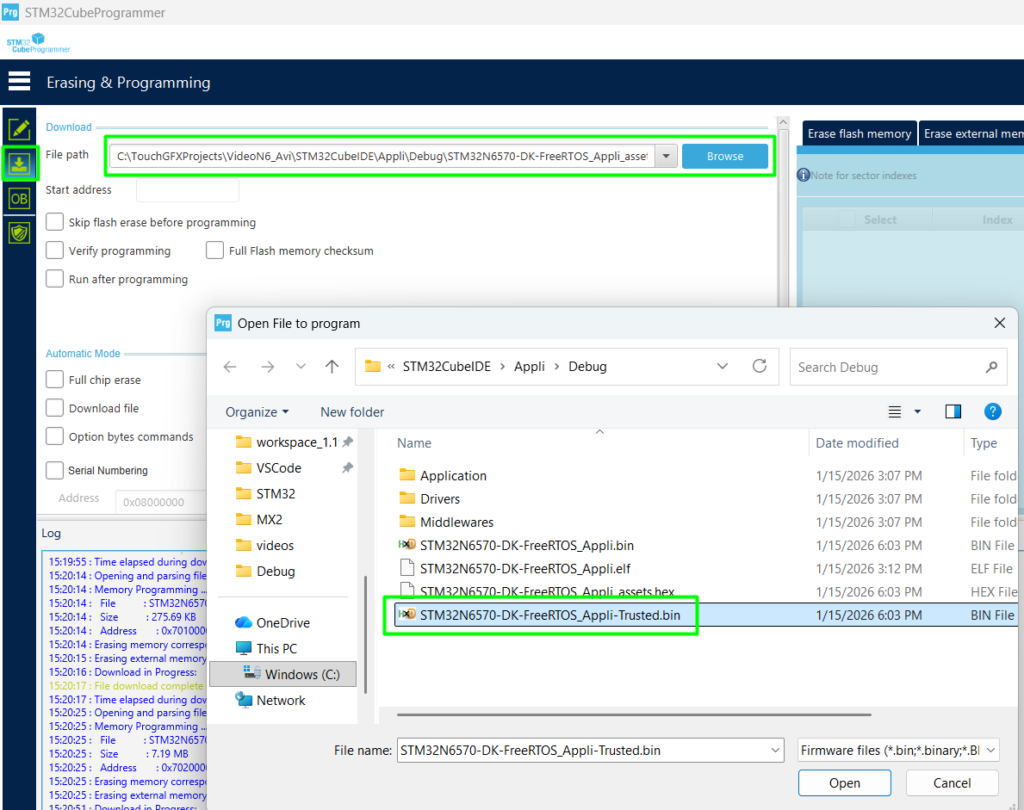
Under C:\TouchGFXProjects\{Projec Name}\STM32CubeIDE\Appli\Debug the: STM32N6570-DK-FreeRTOS_Appli_assets.hex and the STM32N6570-DK-FreeRTOS_Appli-Trusted.bin
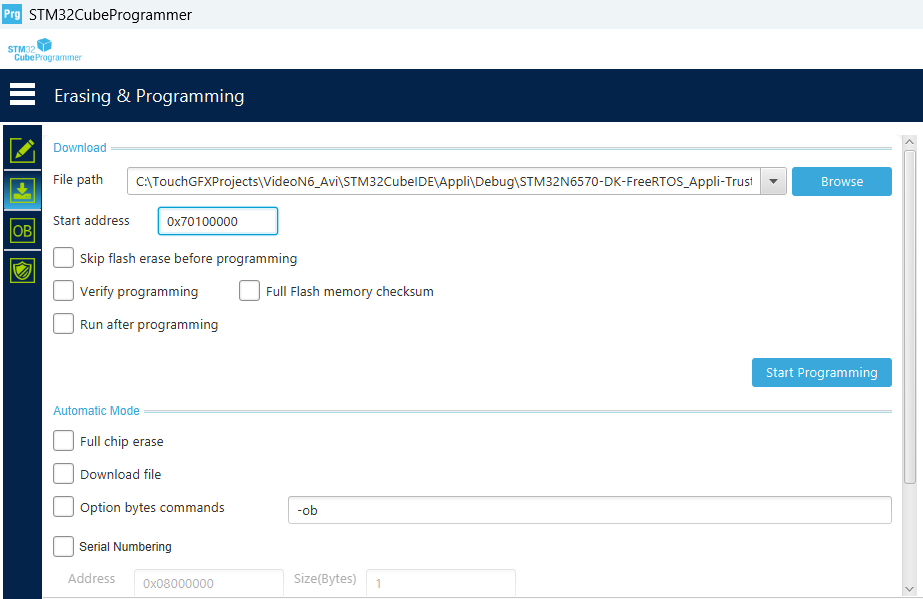
Step 3: Programming
After building, open the STM32CubeProg.
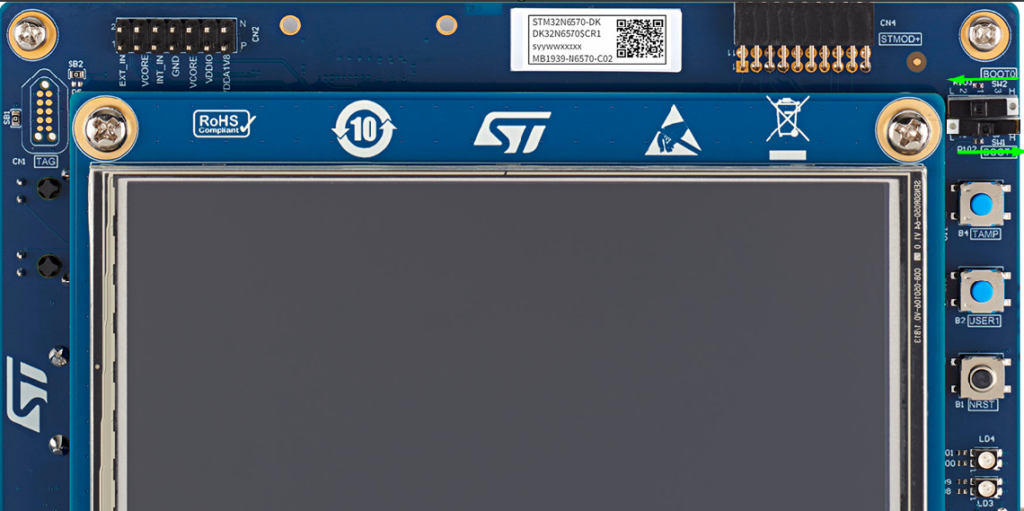
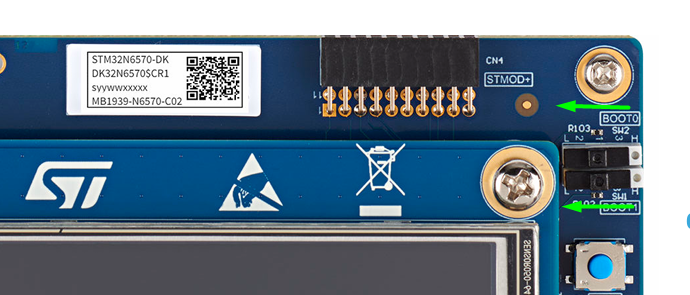
Before connecting the USB cable, make sure that your BOOT jumpers/Switches are like this (DEV BOOT MODE):
Make sure you are using a USB C cable on both sides, as this board is power hungry and will demand more than 500mA. And now that you have, you are free to connect the USB cable
Within the STM32CubeProg, add the external memory loader for the onboard NOR FLASH memory:

Note: if you can’t connect to the board, double check the BOOT mode and power cycle (reset doesn’t work)
Program the binaries as this FSBL @ 0x70000000, Appli (trusted) @ 0x70100000 and the assets is a hex file, so that one is easy. For example>
6. Validation: Play Video STM32
Once all programming is completed, you can roll back the BOOT pins to L/L:
Reset or Power Cycle the MCU (in this case, reset works). The video will start:
On Part 2, we’ll focus only on the audio implementation and Part 3 will merge the two.
Conclusion
By decoupling video and audio and targeting “native” MCU formats (MJPEG and Little-Endian PCM), you drastically reduce the complexity of your C code. This approach allows the STM32N6 to focus its power on application logic and UI responsiveness rather than struggling with heavy software decompression.
Happy Coding 🙂