Learn how to create custom CMAKE Preset and change optimization in VS Code.
Abstract
Optimization level is one of the most important build decisions in embedded development. When working on STM32C5 in VS Code with the STM32CubeIDE extension, it is best to manage optimization through CMake rather than changing settings manually in the IDE.
This article explains how to:
- treat optimization as part of your build intent
- switch cleanly between debug-friendly and optimized builds
- rebuild and compare memory usage, artifact size, and debug behavior
- use CMake presets to keep the workflow reproducible
If you want a development process that is easy to debug but still representative of the final firmware, this is the right approach.
1. Introduction
In embedded projects, the build configuration is not just a technical detail, it shapes the way you work every day.
With STM32C5, that matters even more. The MCU has real memory constraints, and compiler optimization can change:
- flash usage
- RAM consumption
- stepping behavior in the debugger
- variable visibility
- timing and inlining behavior
If you are developing in VS Code with the STM32CubeIDE extension, the cleanest way to manage this is through CMake. That gives you a repeatable setup where each preset clearly expresses a purpose:
- Debug for diagnosis
- Release-like for realistic verification
This article walks through that workflow in a practical way.
2. Why Optimization Belongs in Presets
The most common mistake is treating optimization as something you toggle only when needed. That works for a quick test, but it becomes hard to reproduce later.
A better approach is to define optimization as part of the build preset.
That means your project clearly says:
- this preset is for debugging
- this preset is for optimized verification
With CMake, that intent becomes visible and consistent across your team, your own machine, and CI builds.
Why this matters on STM32C5
On a microcontroller target, the difference between build modes is not cosmetic. A Debug configuration may keep code easier to inspect, while an optimized build may reduce memory usage significantly and behave more like the final product.
Upon creating a new project from STM32CubeMX2, just the Debug is created. We can add a new one by simply Ctrl+Shift+P and select ‘CMake: Select Configure Preset’:

Then select to ‘Add a New Preset’:

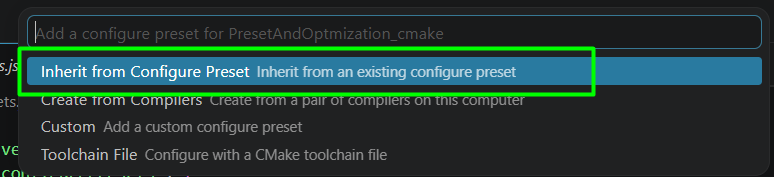
Then select to inherit it from Configure Preset:
Then finally, select the ‘debug_GCC_STM32C563RET6’ and name it:

In this case, it will be called ‘Release’:

At this point in time, if you again press Ctrl+Shift+P and select to change the CMAKE preset to the newly created Release, you’ll get an error message. This is expected and here are the steps to adjust it. Locate the cmake folder:

For matters of simplicity, the example will comment the points that will be the same for both presets.
components.cmake
Comment the ‘if’ and ‘endif’ statements:


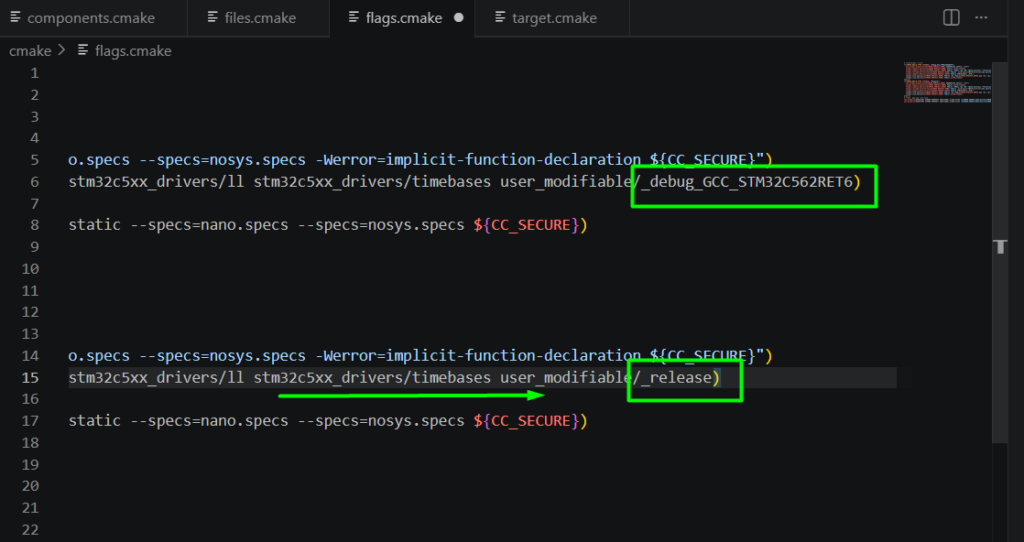
For ‘files.cmake’ and ‘target.cmake’, just comment the ‘if’ and ‘endif’ statement in those files. Now, for the ‘flags.cmake’, we’ll copy the entire ‘if’ content and change it to be specifically for our ‘Release’ preset:
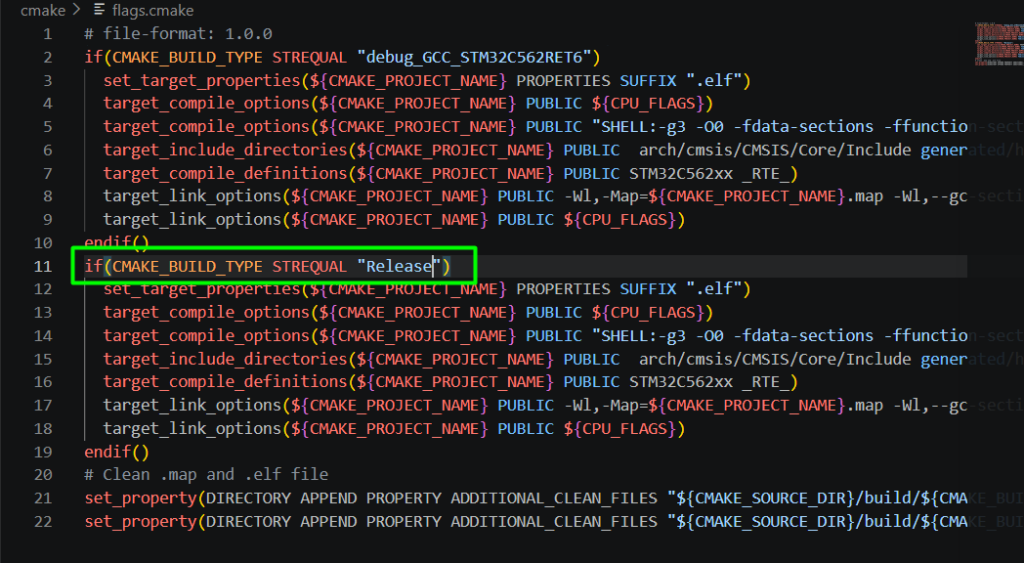
Also change the folder to be _release
3. Changing the Setting the Right Way
When you use VS Code with the STM32CubeIDE extension, it is tempting to look for a one-click “optimization” setting in the UI. But if your project is CMake-based, the real source of truth should be the CMake configuration.
That means you should change optimization in one of these places:
- CMakePresets.json
- CMakeLists.txt
- toolchain-related CMake files
- a project-specific configuration module
The practical goal
Use a debug-oriented configuration while you are:
- setting breakpoints
- checking peripheral initialization
- validating logic step by step
Use an optimized configuration when you are:
- checking flash and RAM usage
- validating realistic runtime behavior
- preparing a release candidate
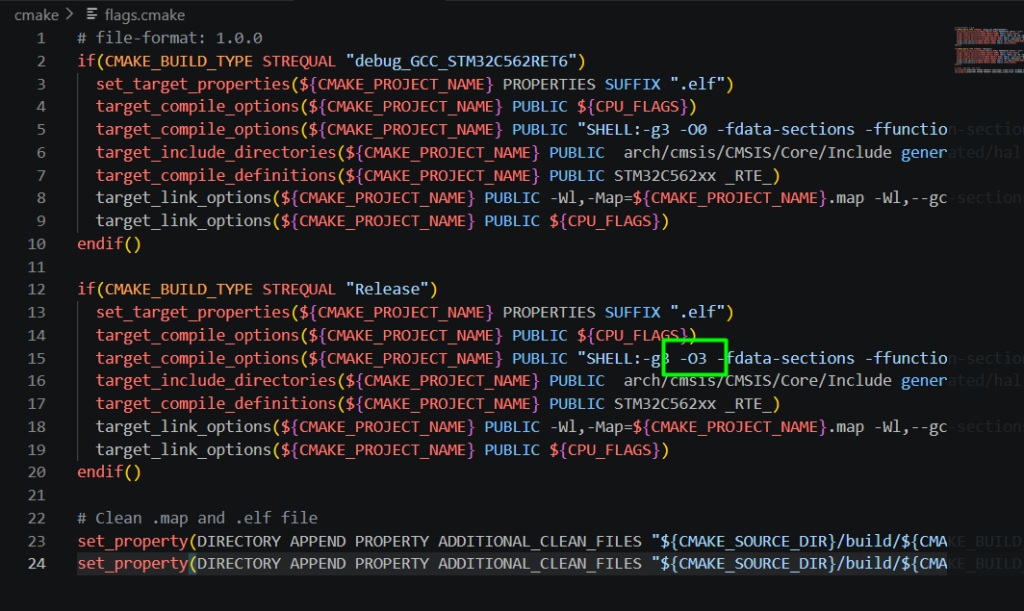
What to edit during the hands-on
This is quite simple, in the flags.cmake, change the optimization to the desired one, here we’ll use -O3
4. Hands-on demo: Rebuild and Compare
Using the previous article of the series> – Hacker Embedded STM32: How to create a Project with VS Code and STM32CubeIDE extension, create the simple example to test it out.
Once the configuration is changed, rebuild the project and compare the results. This is the point where the trade-off becomes visible.
What to compare
On STM32C5, the most useful comparison points are:
- Flash memory usage
- RAM usage
- binary size
- debug stepping quality
- whether variables are optimized out
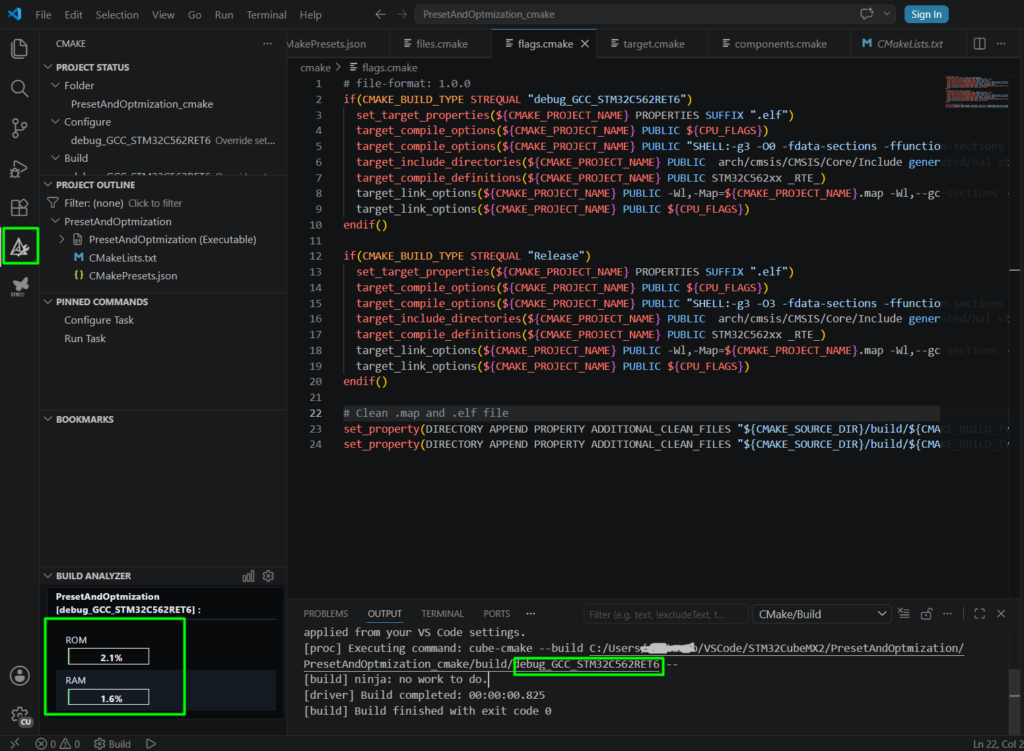
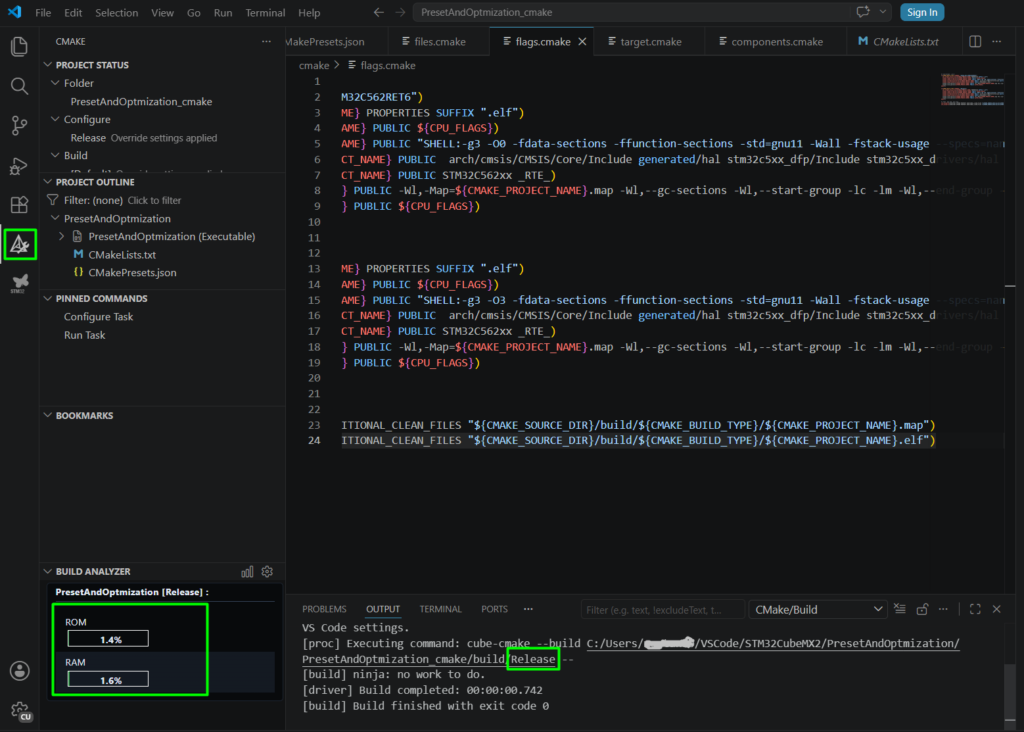
A simple example memory comparison
Default debug preset
Release
5. What to observe
In the Debug build, you may notice:
- smoother source-level stepping
- easier variable inspection
- more predictable breakpoints
In the optimized build:
- some variables may disappear
- lines may be skipped during stepping
- the code resembles the final firmware more closely
That difference is exactly why both builds are useful
6. Conclusion
Optimization level should be treated as part of the build strategy, not as an afterthought. In a VS Code + STM32CubeIDE extension + CMake workflow, the cleanest approach is to define it in your CMake presets and keep it reproducible.
For STM32C5, this is especially valuable because the difference between Debug and optimized builds can be seen clearly in memory usage, stepping quality, generated artifact size and runtime realism.
Happy coding =)